Thorninger.com |
About, Bird photography, Landscape and Seascape, Macro and extreme macro photography, Surreal trick photography |
| Grafting apple trees |
|---|
 |
step by step |
Darken the sky with Photoshop CC step by step |
|---|
| In landscape photography, the sky is often 2-3 stops brighter than the rest of the landscape. The camera can't capture as many tones as the eye, and the sky in a photo will often be white with no detail. The sky with clouds is an essential part of a landscape, and it can improve a photo significantly if one makes the sky darker without making the rest of the image darker. In this tutorial, I will show how it can be done step by step. |
 |
This is a final photo with a darker sky and contrast in the clouds. |
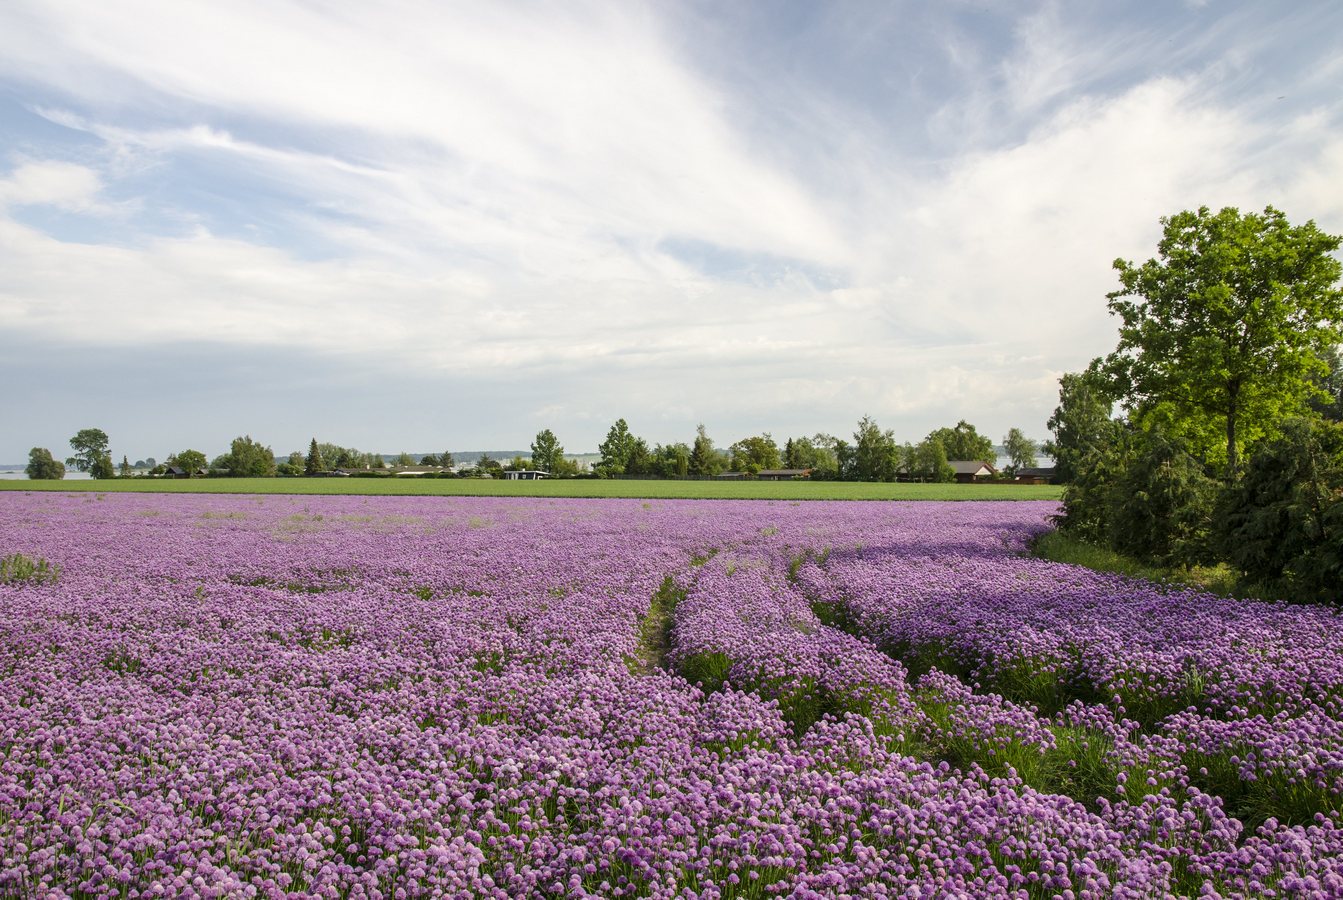 |
This is the original photo, where the clouds are white with now contrast. |
 |
What we will do is to make 2 copy of the photo. One where the chives looks right, and another where the sky is darker and then blend the photos. Make 2 copies of the photos and save them in TIF. Open one photo in the raw converter with Open as raw. |
 |
Use Graduated Filter to make the sky darker. It doesn't matter if the chives get darker to. Open the photo and save it. |
 |
Select the original photo and open the Channel menu. 1. load channel as selection, 2. save Channel as selection. |
 |
Hold down 3 keys, Shift, Ctrl and Alt and double mouseklick on the symbol for Alha channel 1. Do the same thing again. Now the brighter part of the sky is selected. |
 |
Select inverse. Every thing but the brightest array are marked. |
 |
Use the Quick selection tool to mark the chives. |
 |
Select inverse. |
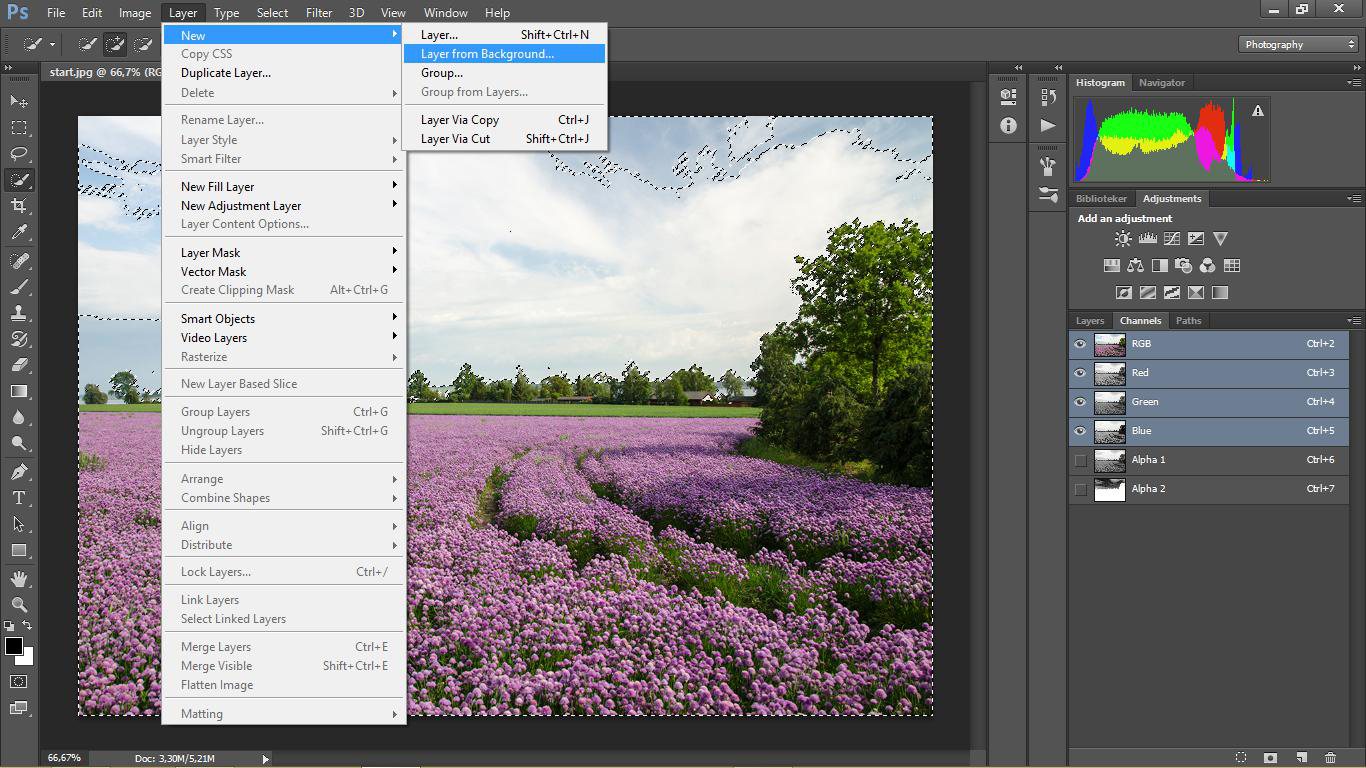 |
Select Layer/New/Layer from bachground. Push OK on the pop up screen. |
 |
Select Edit/cut and the brightest of the sky is gone. |
 |
Save the photo with Alpha Channels and layers. |
 |
Make sure that the 2 photos that are to be blended are saved and open. Select File/Scripts/Load files into stack. |
 |
Select Add open files and OK. |
 |
Make sure the lightest photo are on top and selectet. Use the slider to balance the tones. |
 |
| Double mouseklick with the red arrow and select Merge down. The photo are finish and the sky are darker than on the original photo. |
| About, Bird photography, Landscape and Seascape, Macro and extreme macro photography, Surreal trick photography |
|---|